Technical FAQ
Viewer opens but does not show any thumbnails
Thumbnails may not appear in your DICOMWeb application for various reasons. This guide focuses on one primary scenario, which is you are using
the supportsWildcard: true in your configuration file while your sever does not support it.
One
For instance for the following filtering in the worklist tab we send this request

https://d33do7qe4w26qo.cloudfront.net/dicomweb/studies?PatientName=*Head*&limit=101&offset=0&fuzzymatching=false&includefield=00081030%2C00080060
Which our server can respond properly. If your server does not support this type of filtering, you can disable it by setting supportsWildcard: false in your configuration file,
or edit your server code to support it for instance something like
Pseudocode:
For each filter in filters:
    if filter.value contains "*":
        Convert "*" to SQL LIKE wildcard ("%")
        Add "metadataField LIKE ?" to query
    else:
        Add "metadataField = ?" to query
What are the list of required metadata for the OHIF Viewer to work?
Mandatory
All Modalities
StudyInstanceUID,SeriesInstanceUID,SOPInstanceUID: Unique identifiers for the study, series, and object.PhotometricInterpretation: Describes the color space of the image.Rows,Columns: Image dimensions.PixelRepresentation: Indicates how pixel data should be interpreted.Modality: Type of modality (e.g., CT, MR, etc.).PixelSpacing: Spacing between pixels.BitsAllocated: Number of bits allocated for each pixel sample.SOPClassUID: Specifies the DICOM service class of the object (though you might be able to render without it for most regular images datasets, but it is pretty normal to have it)
Rendering
You need to have the following tags for the viewer to render the image properly, otherwise you should use the windowing tools to adjust the image to your liking:
RescaleIntercept,RescaleSlope: Values used for rescaling pixel values for visualization.WindowCenter,WindowWidth: Windowing parameters for display.
Some Datasets
InstanceNumber: Useful for sorting instances (without it the instances might be out of order)
For MPR (Multi-Planar Reformatting) rendering and tools
ImagePositionPatient,ImageOrientationPatient: Position and orientation of the image in the patient.
SEG (Segmentation)
FrameOfReferenceUIDfor handling segmentation layers.- sequences
ReferencedSeriesSequenceSharedFunctionalGroupsSequencePerFrameFunctionalGroupsSequence
RTSTRUCT (Radiotherapy Structure)
FrameOfReferenceUIDfor handling segmentation layers.- sequences
ROIContourSequenceStructureSetROISequenceReferencedFrameOfReferenceSequence
US (Ultrasound)
NumberOfFrames: Number of frames in a multi-frame image.SequenceOfUltrasoundRegions: For measurements.FrameTime: Time between frames if specified.
SR (Structured Reporting)
- Various sequences for encoding the report content and template.
ConceptNameCodeSequenceContentSequenceContentTemplateSequenceCurrentRequestedProcedureEvidenceSequenceContentTemplateSequenceCodingSchemeIdentificationSequence
PT with SUV Correction (Positron Tomography Standardized Uptake Value)
- Sequences and tags related to radiopharmaceuticals, units, corrections, and timing.
RadiopharmaceuticalInformationSequenceSeriesDateSeriesTimeCorrectedImageUnitsDecayCorrectionAcquisitionDateAcquisitionTimePatientWeight
EncapsulatedDocument: Contains the PDF document.
Video
NumberOfFrames: Video frame count .
Optional
There are various other optional tags that will add to the viewer experience, but are not required for basic functionality. These include: Patient Information, Study Information, Series Information, Instance Information, and Frame Information.
How do I handle large volumes for MPR and Volume Rendering
Currently there are two ways to handle large volumes for MPR and Volume Rendering if that does not fit in the memory of the client machine.
useNorm16Texture
WebGL officially supports only 8-bit and 32-bit data types. For most images, 8 bits are not enough, and 32 bits are too much. However, we have to use the 32-bit data type for volume rendering and MPR, which results in suboptimal memory consumption for the application.
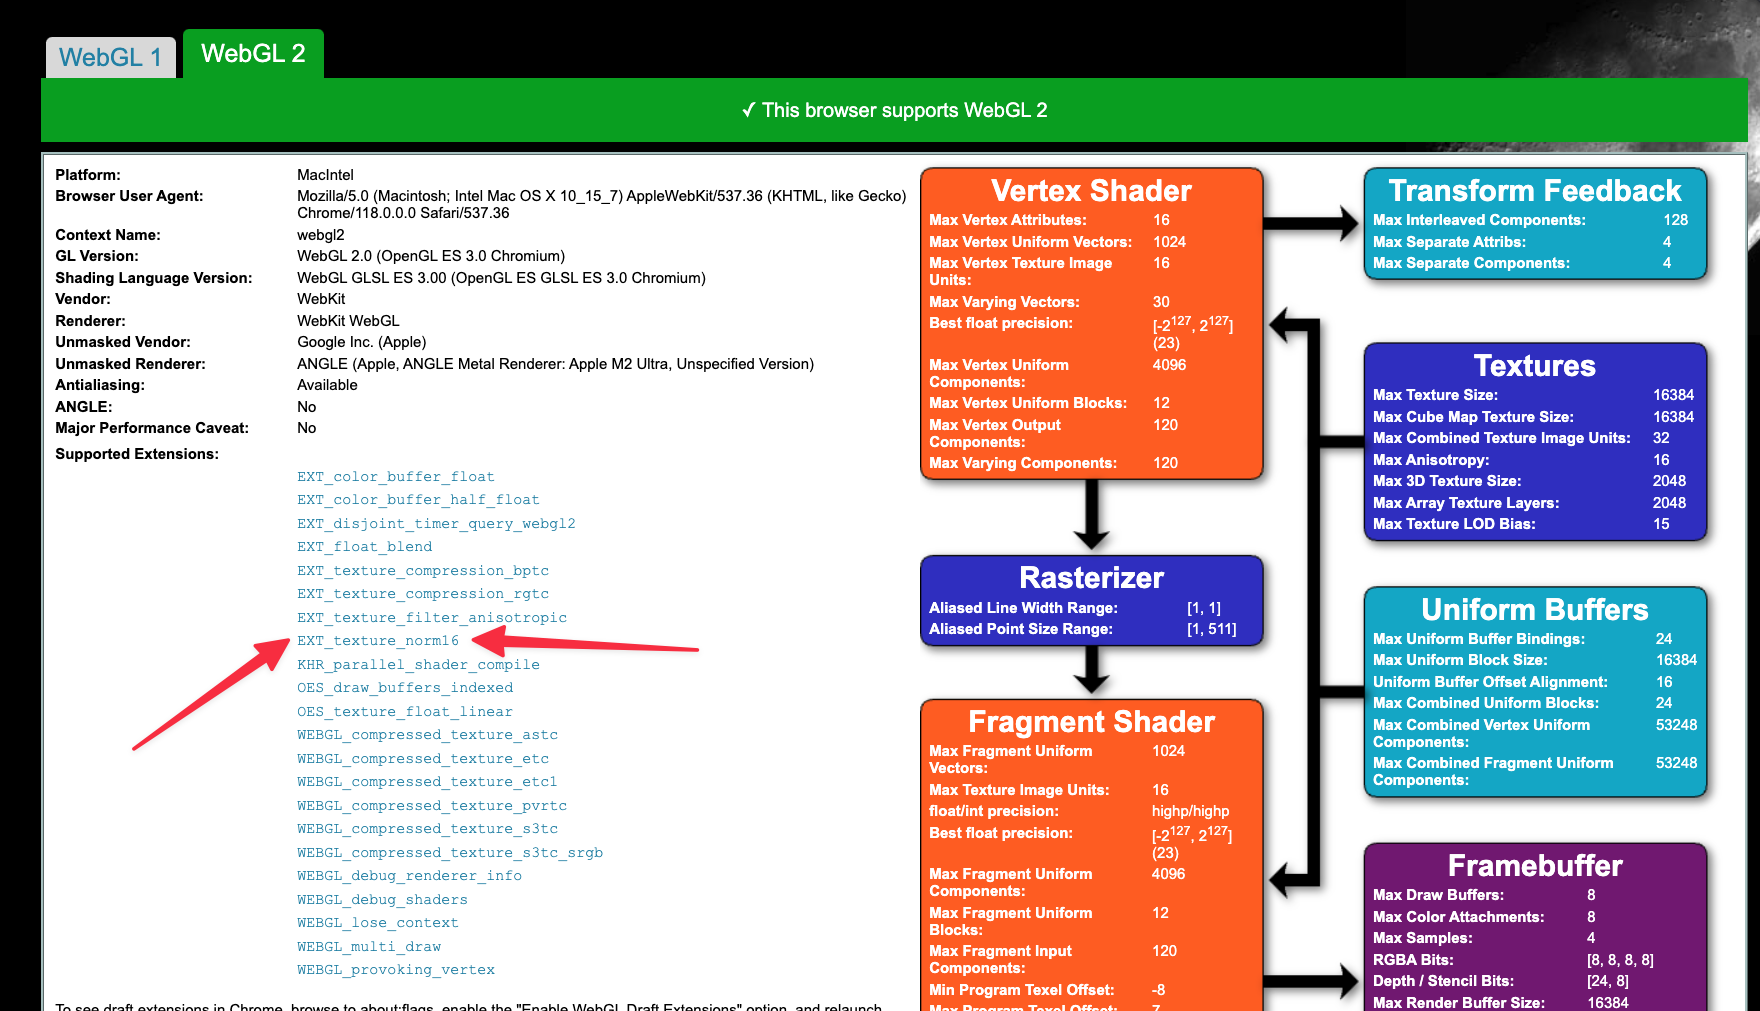
Through EXT_texture_norm16 , WebGL can support 16 bit data type which is ideal for most images. You can look into the webgl report to check if you have that extension enabled.
This is a flag that you can set in your configuration file to force usage of 16 bit data type for the volume rendering and MPR. This will reduce the memory usage by half.
For instance for a large pt/ct study
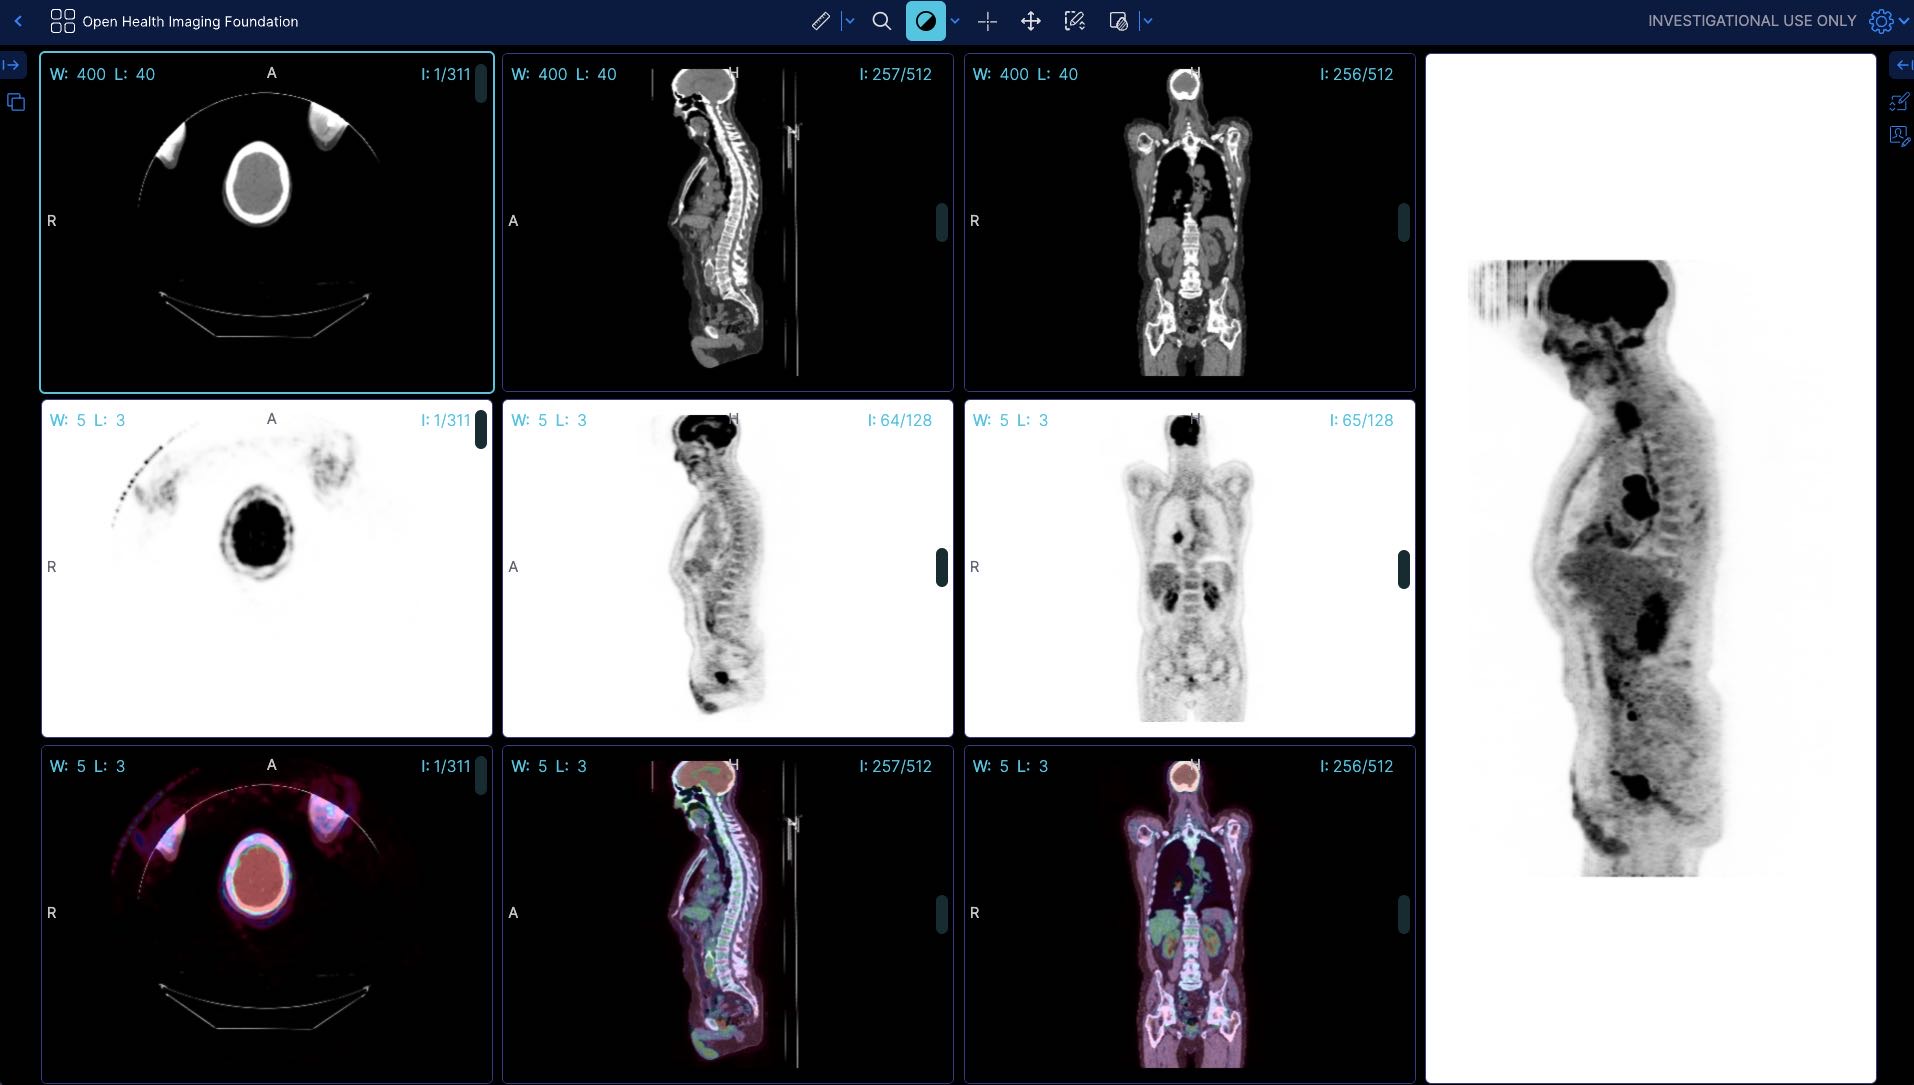
Before (without the flag) the app shows 399 MB of memory usage
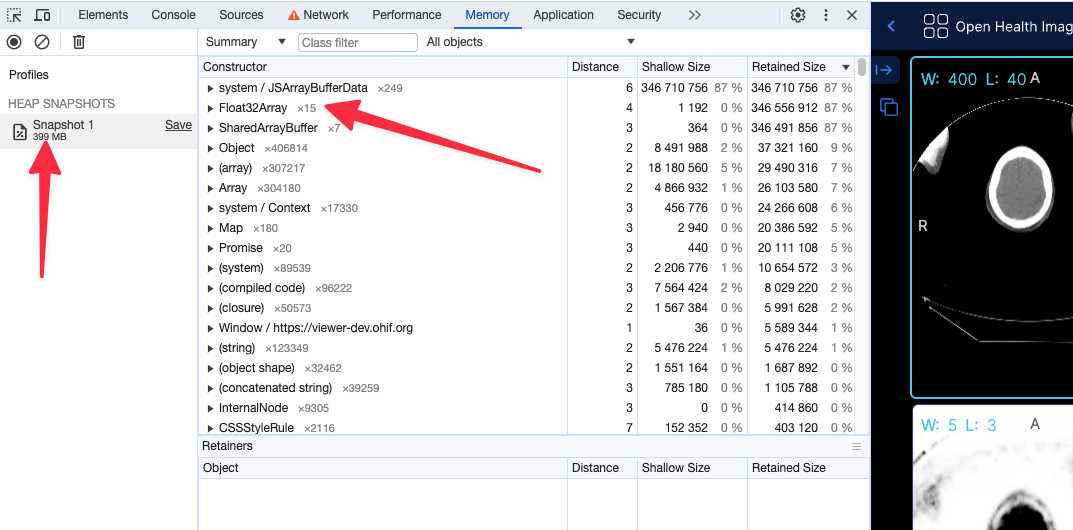
After (with flag, running locally) the app shows 249 MB of memory usage
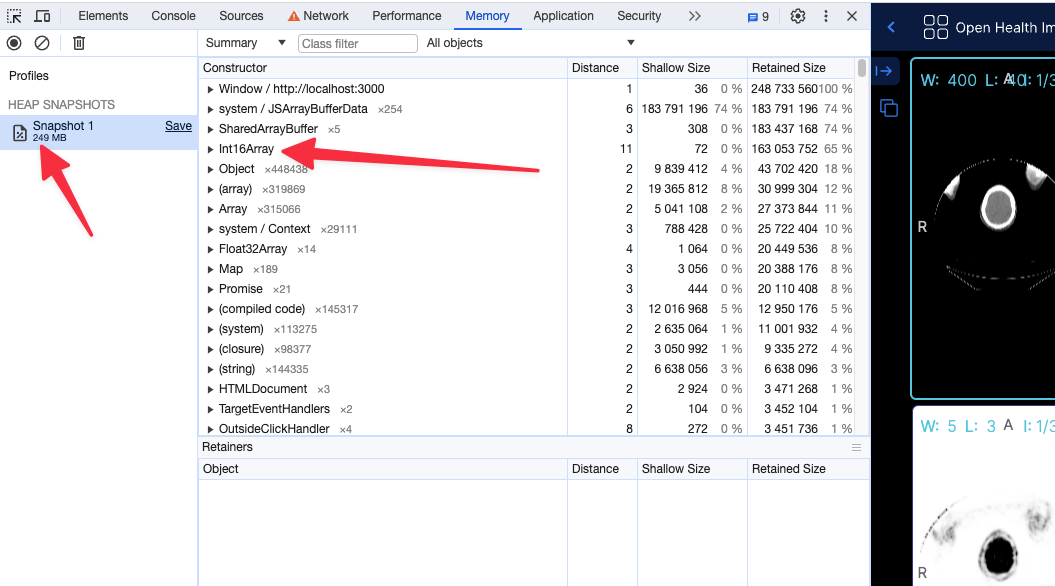
Using the 16 bit texture (if supported) will not have any effect in the rendering what so ever, and pixelData would be exactly shown as it is. For datasets that cannot be represented with 16 bit data type, the flag will be ignored and the 32 bit data type will be used.
Read more about these discussions in our PRs
Although the support for 16 bit data type is available in WebGL, in some settings (e.g., Intel-based Macos) there seems to be still some issues with it. You can read and track bugs below.
preferSizeOverAccuracy
This is another flag that you can set in your configuration file to force the usage of the half_float data type for volume rendering and MPR. The main reason to choose this option over useNorm16Texture is its broader support across hardware and browsers. However, it is less accurate than the 16-bit data type and may lead to some rendering artifacts.
Integers between 0 and 2048 can be exactly represented (and also between −2048 and 0)
Integers between 2048 and 4096 round to a multiple of 2 (even number)
Integers between 4096 and 8192 round to a multiple of 4
Integers between 8192 and 16384 round to a multiple of 8
Integers between 16384 and 32768 round to a multiple of 16
Integers between 32768 and 65519 round to a multiple of 32
As you see in the ranges above 2048 there will be inaccuracies in the rendering.
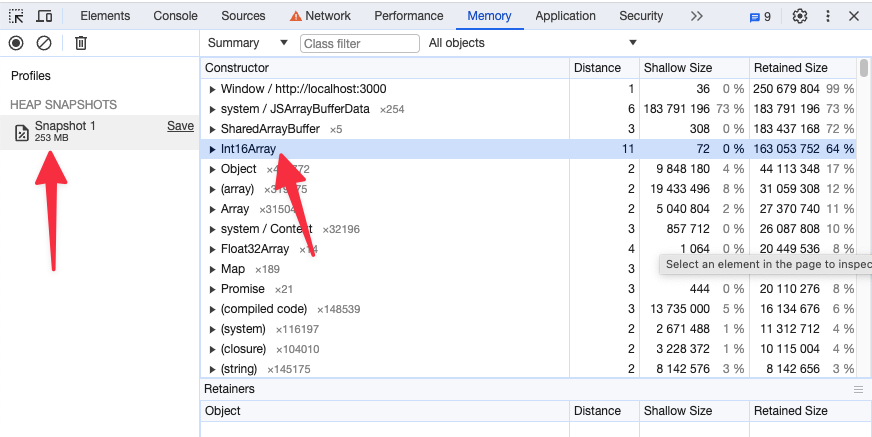
Memory snapshot after enabling preferSizeOverAccuracy for the same study as above
How to dynamically load a measurement
You can dynamically load a measurement by using a combination of MeasurementService and CornerstoneTools Annotation API. Here, we will demonstrate this with an example of loading a Rectangle measurement.
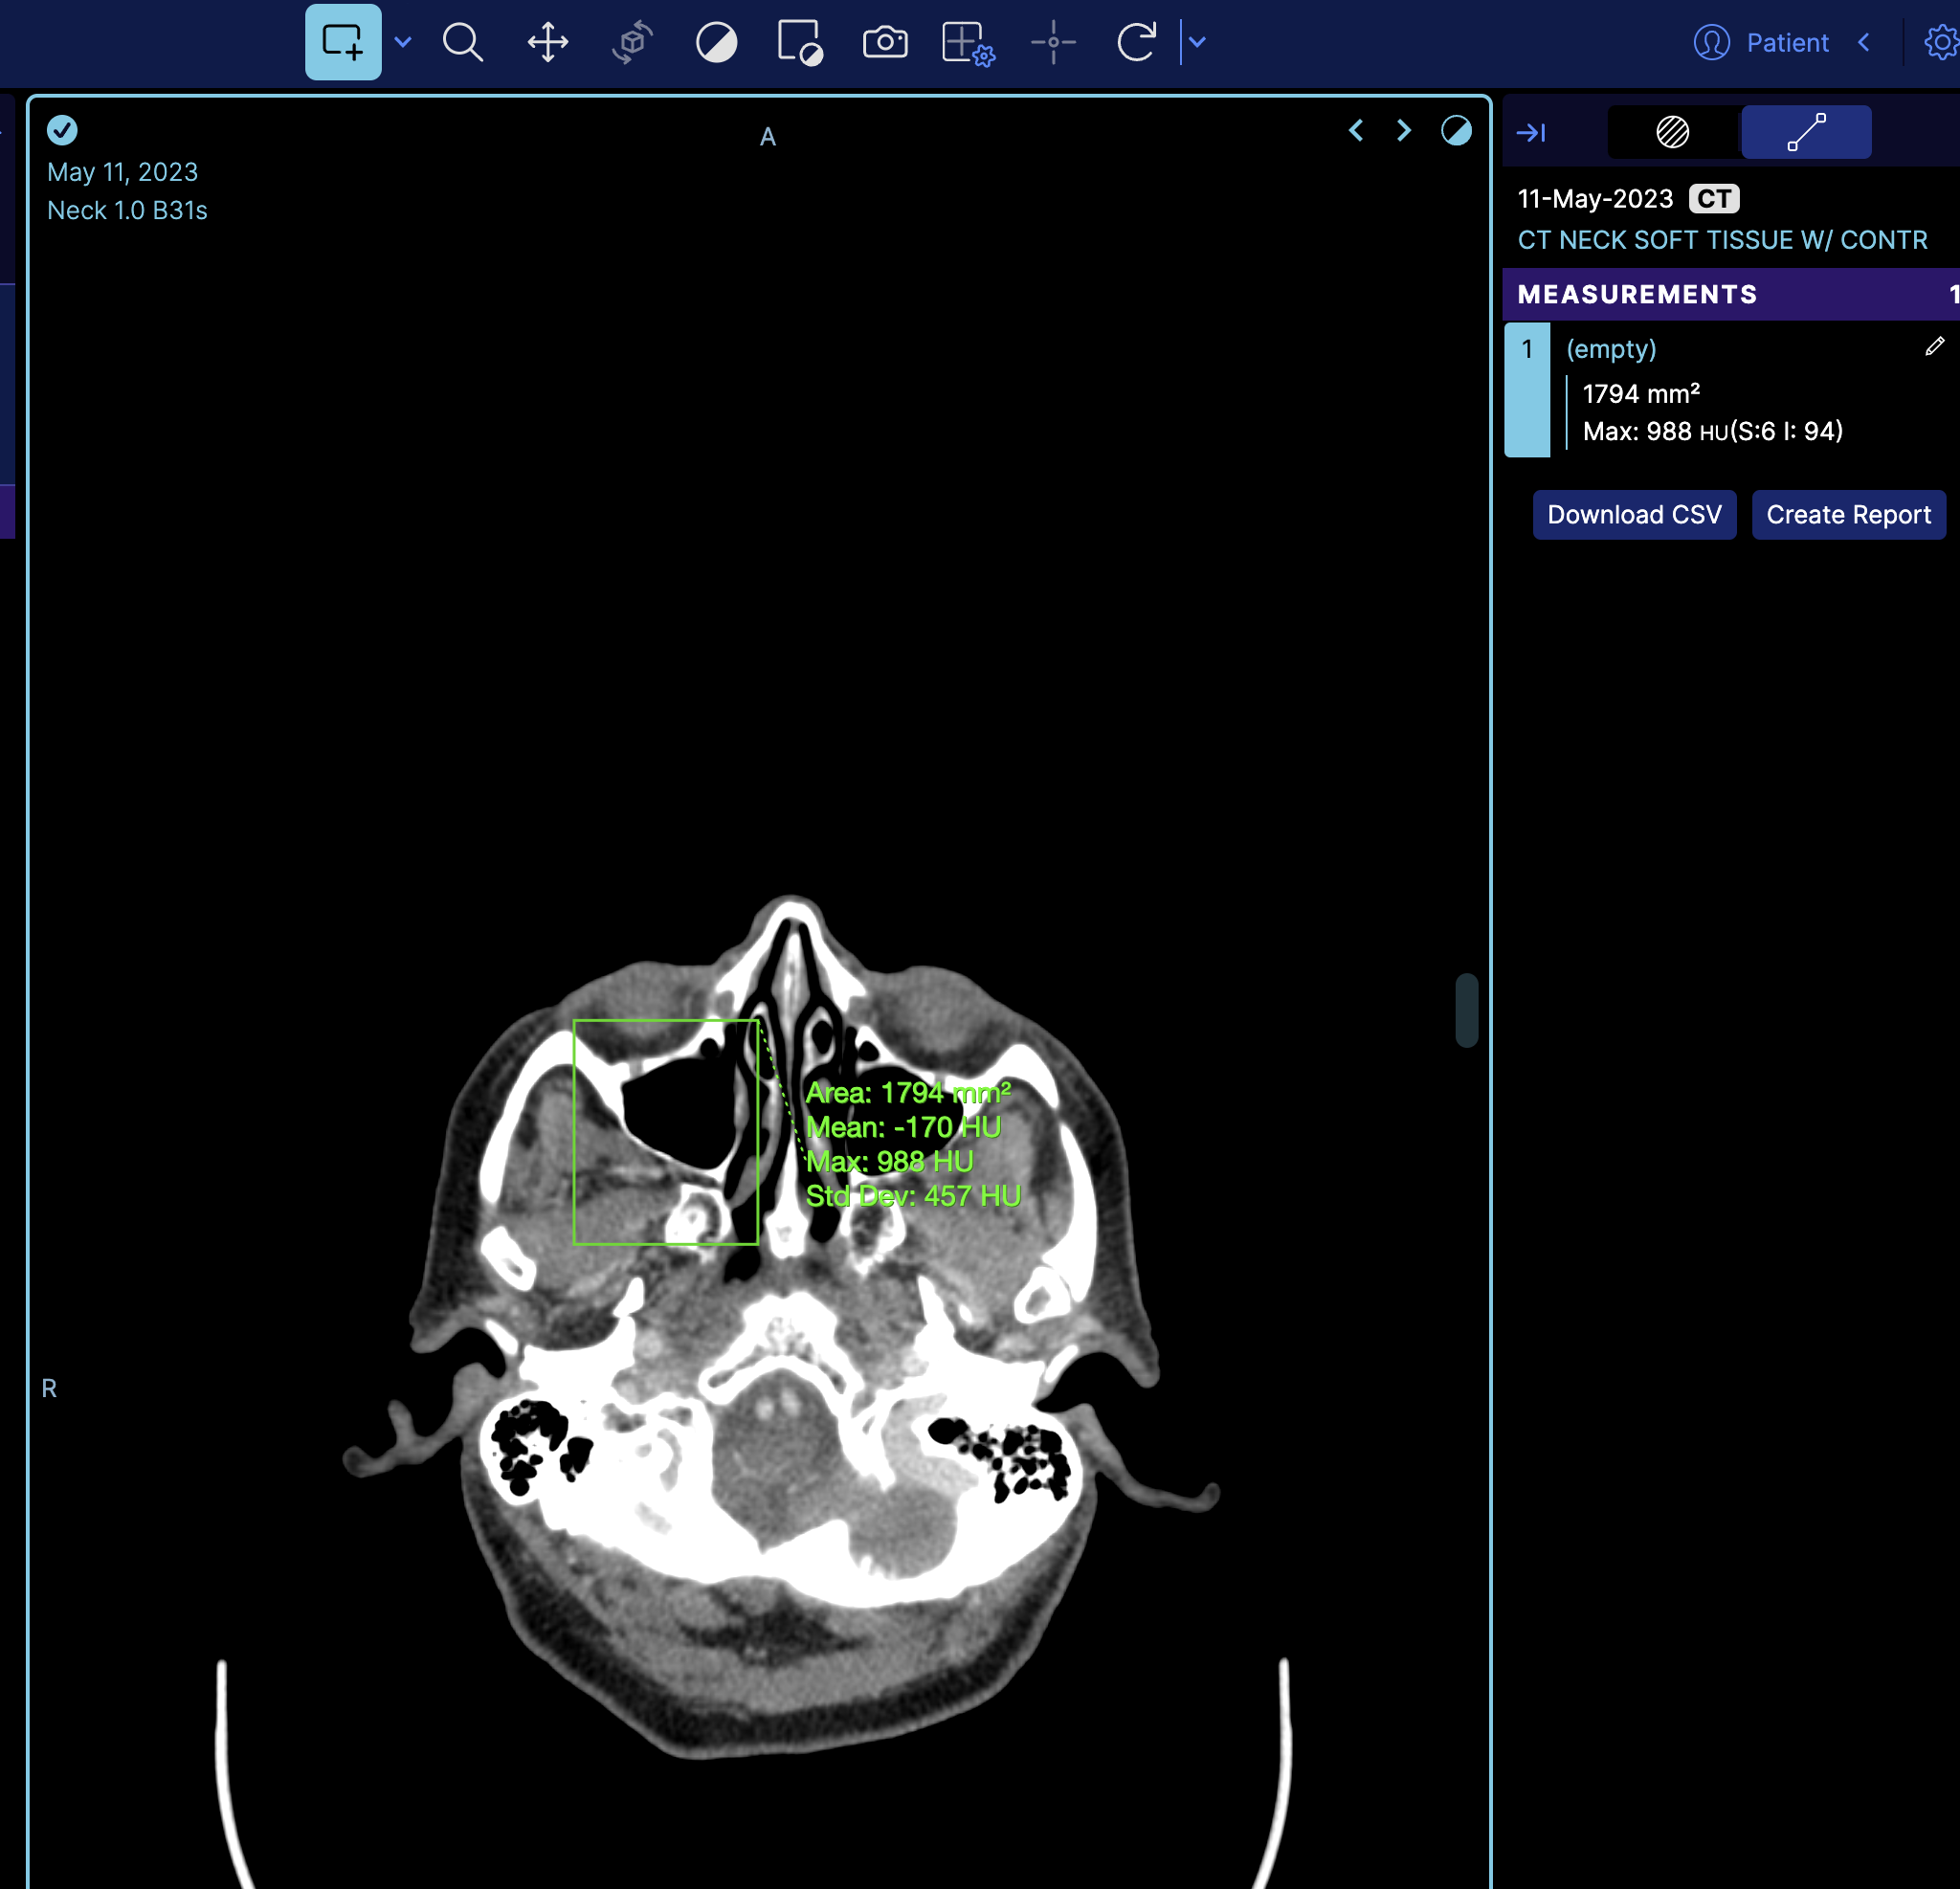
So if we look at the terminal and get the measurement service we can see there is one measurement
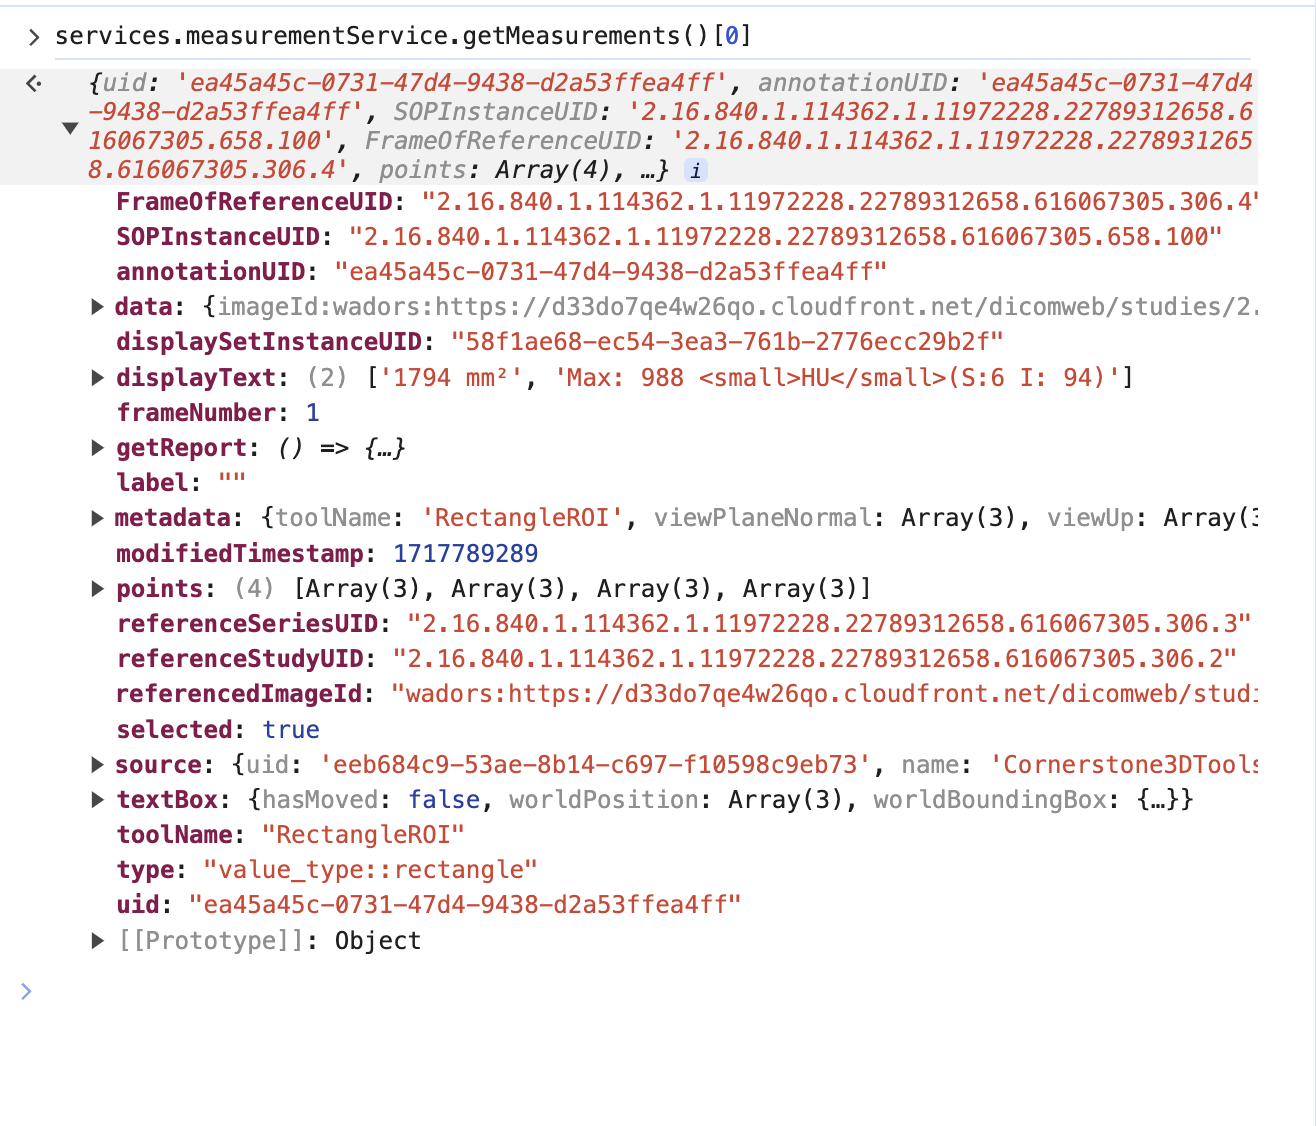
However, this is the mapped cornerstone measurement inside OHIF, and it has additional information such as geReport and source, which are internal details of OHIF Viewers that you don't need to worry about.
we can call the cornerstoneTools api to grab the raw annotation data with the uid
cornerstoneTools.annotation.state.getAnnotation("ea45a45c-0731-47d4-9438-d2a53ffea4ff")
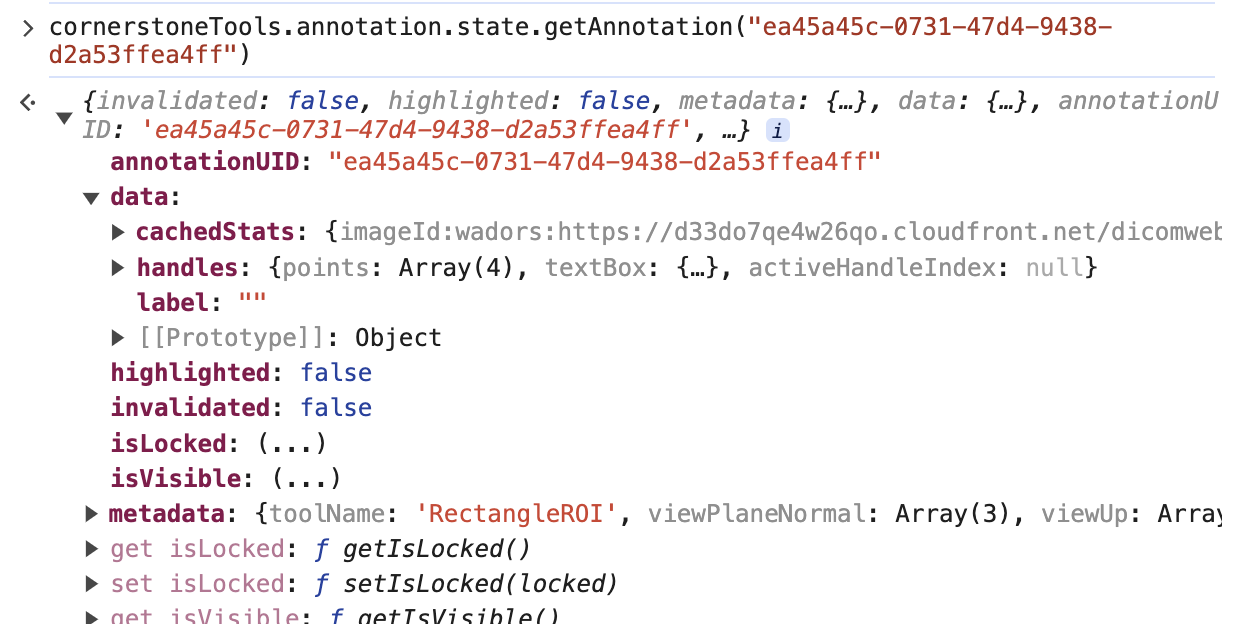
Note: There is a pointsInShape attribute inside the data that stores the points within the annotation for some tools like Rectangle and EllipticalRoi. However, you can remove that attribute as well.
For the sake of this example, I have extracted those keys and uploaded them to our server for fetching.
https://ohif-assets.s3.us-east-2.amazonaws.com/ohif-faq/rectangle-roi.json
Now, let's discuss how to load this measurement dynamically and programmatically.
There are numerous places in OHIF where you can add annotations, but we always recommend having your own extensions and modes to maintain full control over your custom API.
For this example, I will add the logic in the longitudinal mode. However, as mentioned, you can create your own extension and mode, and either use onModeEnter or other lifecycle hooks to add annotations. Learn more about lifecycle hooks here.
Of course, you need to load the appropriate measurement for each study. However, for simplicity's sake, I will hardcode the URL in this example.
import * as cs3dTools from '@cornerstonejs/tools';

onModeEnter: function ({ servicesManager, extensionManager, commandsManager }: withAppTypes) {
  // rest of logic

  const annotationResponse = await fetch(
    'https://ohif-assets.s3.us-east-2.amazonaws.com/ohif-faq/rectangle-roi.json'
  );

  const annotationData = await annotationResponse.json();

  cs3dTools.annotation.state.addAnnotation(annotationData);
},
As you can see, we use the CornerstoneTools API to add the annotation. Since OHIF has mappers set up for CornerstoneTools (extensions/cornerstone/src/utils/measurementServiceMappings/measurementServiceMappingsFactory.ts), it will automatically map the annotation to the OHIF measurement service.
If you refresh the viewer, you'll see the measurement loaded on the image.
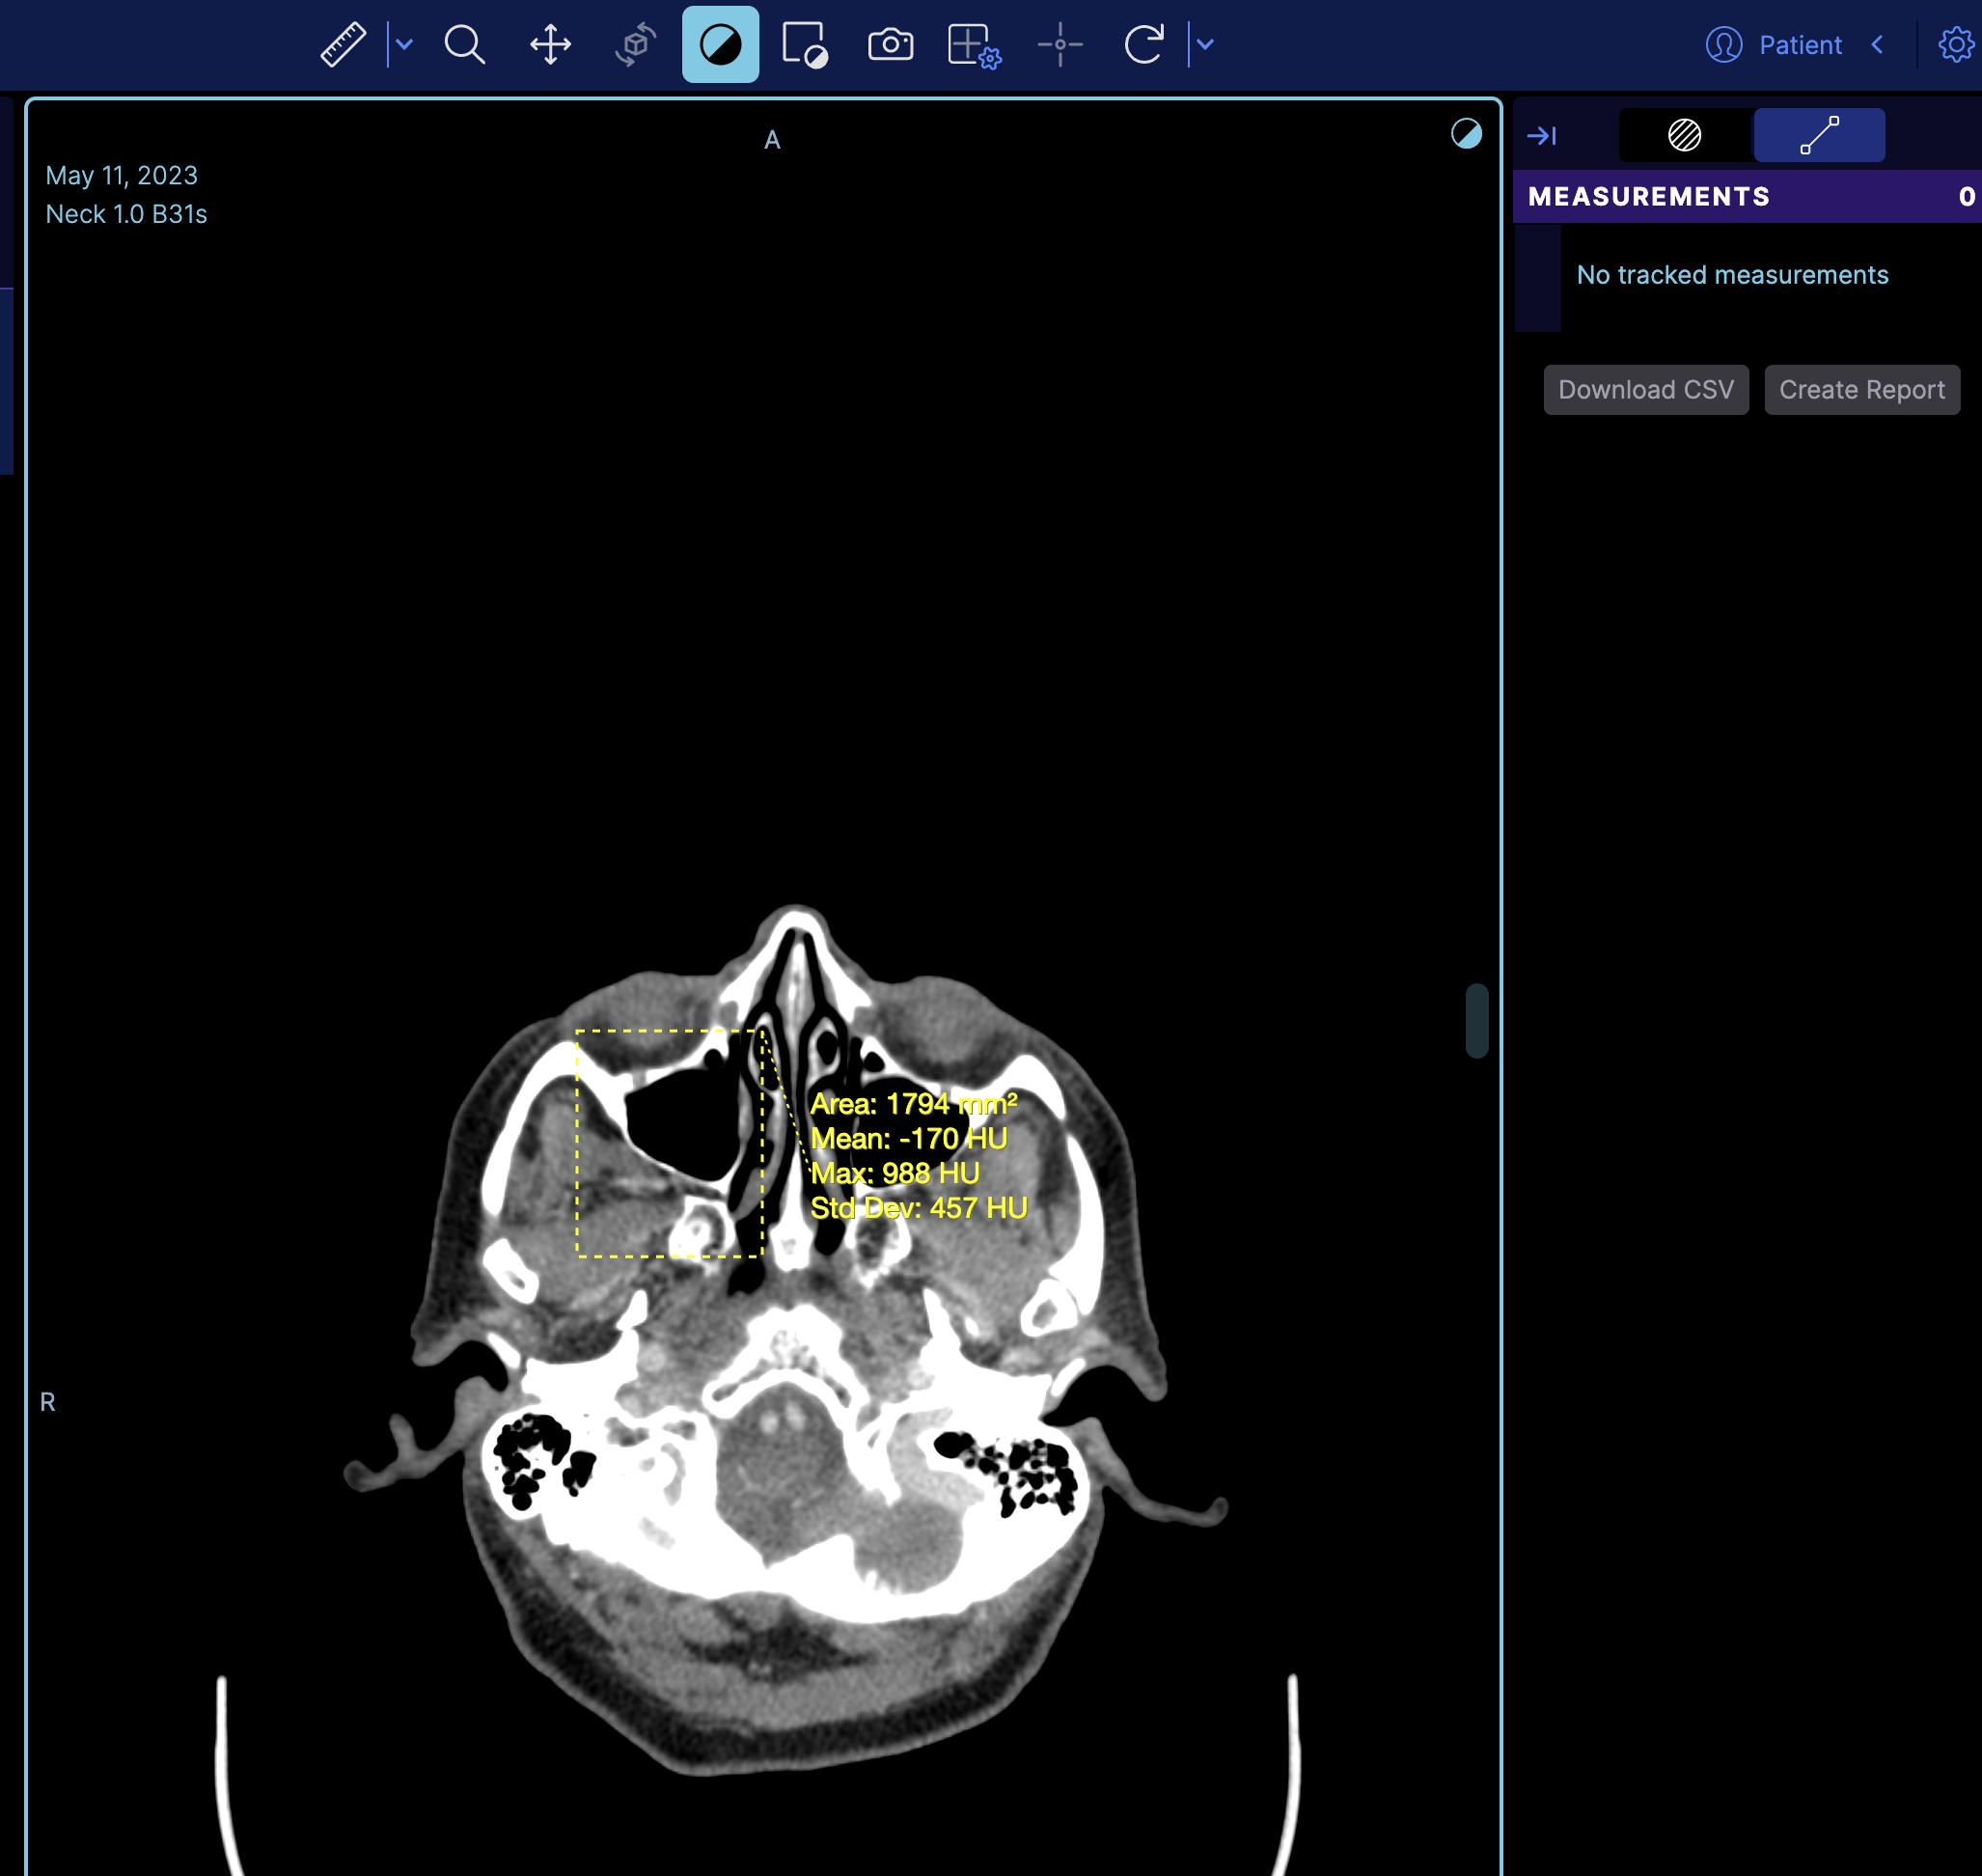
But if you notice it does not appear on the right panel, the reason is that the right panel is the tracking measurement panel. You can switch to a non-tracking measurement by changing
rightPanels: [dicomSeg.panel, tracked.measurements],
to
rightPanels: [dicomSeg.panel, '@ohif/extension-default.panelModule.measure'],
which then it will look like
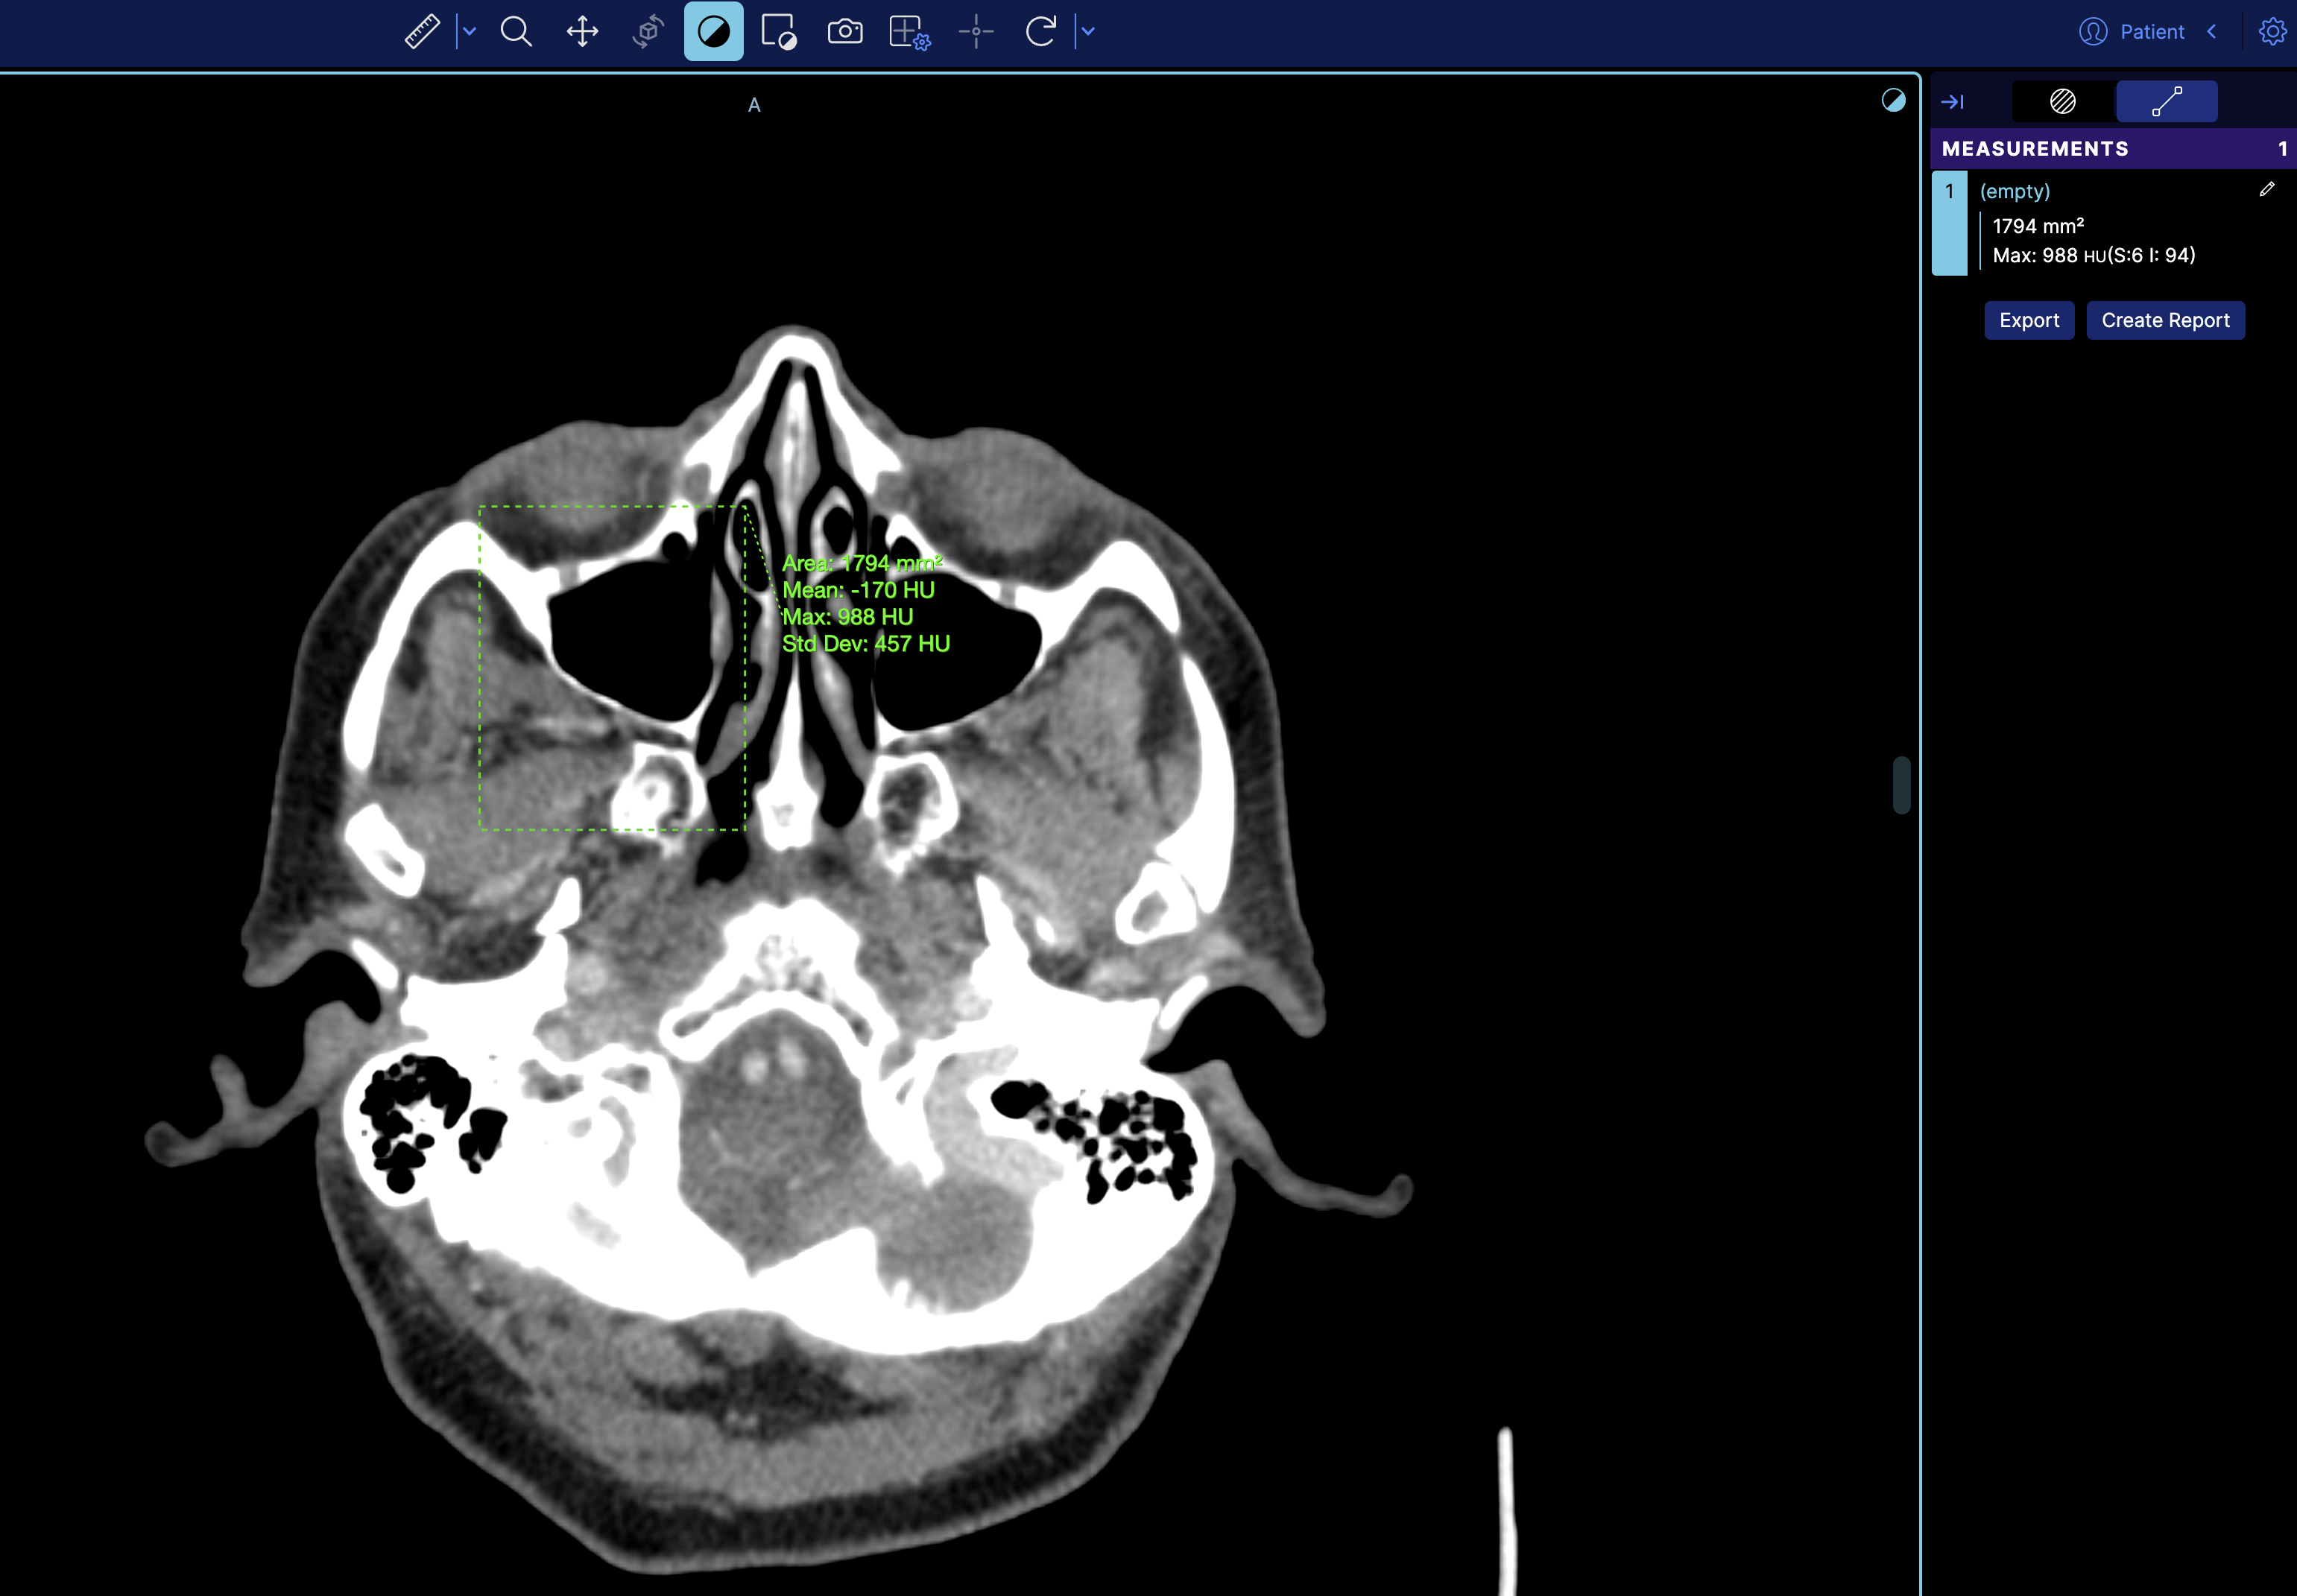
There is also dedicated example for this in the cornerstone3D examples.
How do I sort the series in the study panel by a specific value
You need to enable the experimental StudyBrowserSort component by setting the experimentalStudyBrowserSort to true in your config file. This will add a dropdown in the study panel to sort the series by a specific value. This component is experimental
since we are re-deigning the study panel and it might change in the future, but the functionality will remain the same.
{
  experimentalStudyBrowserSort: true,
}
The component will appear in the study panel and will allow you to sort the series by a specific value. It comes with 3 default sorting functions, Series Number, Series Image Count, and Series Date.
You can sort the series in the study panel by a specific value by adding a custom sorting function in the customizationModule, you can use the existing customizationModule in extensions/default/src/getCustomizationModule.tsx or create your own in your extension.
The value to be used for the entry is studyBrowser.sortFunctions and should be under the default key.
Example
export default function getCustomizationModule({ servicesManager, extensionManager }) {
  return [
    {
      name: 'default',
      value: [

        {
          id: 'studyBrowser.sortFunctions',
          values: [
            {
              label: 'Series Number',
              sortFunction: (a, b) => {
                return a?.SeriesNumber - b?.SeriesNumber;
              },
            },
            // Add more sort functions as needed
          ],
        },
      ],
    },
  ];
}
Explanation
This function will be retrieved by the StudyBrowserSort component and will be used to sort all displaySets, it will reflect in all parts of the app since it works at the displaySetService level, which means the thumbnails in the study panel will also be sorted by the desired value. You can define multiple functions and pick which sort to use via the dropdown in the StudyBrowserSort component that appears in the study panel.
How can i change the sorting of the thumbnail / study panel / study browser
We are currently redesigning the study panel and the study browser. During this process, you can enable our undesigned component via the experimentalStudyBrowserSort flag. This will look like:
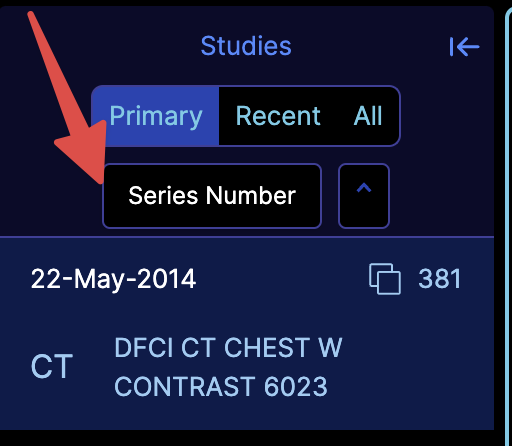
You can also add your own sorting functions by utilizing the customizationService and adding the studyBrowser.sortFunctions key, as shown below:
customizationService.addModeCustomizations([
  {
    id: 'studyBrowser.sortFunctions',
    values: [{
      label: 'Series Images',
      sortFunction: (a, b) => {
        return a?.numImageFrames - b?.numImageFrames;
      },
    }],
  },
]);
Notice the arrays and objects, the values are arrays
How do I change the cine auto mount behavior
You can change the cine auto mount behavior by adding the autoCineModalities mode customization, the value is an array of modalities that should be mounted with cine.
By default the viewer will mount with cine enabled for OT and US modalities.
customizationService.addModeCustomizations([
  {
    id: 'autoCineModalities',
    modalities: ['OT', 'US'],
  },
]);